Friday, December 27, 2019

Yet another garage

I doubt anybody but Skory follows this blog any more, but that's good enough for me.

It's crazy to look back. The only activity since the last blog post (in 2013!) was...

...Felix was born, Camilo was born, we had to move because the owner of our rental wanted to sell, we spent a year and a half in a "temporary" rental, I got tenure, we went to Mexico on sabbatical, came back to another temporary rental, and are now moving into a new house. I also went on a few epic backpacking trips during this time, and probably a lot more I can't remember...

...so quite a bit, really, but almost nothing on the car. I think I managed to do just a bit of electrical work and rubber seals; can't be more than a couple hours of work in a span of about 6 years. But just before Christmas, I recovered the car from the garage where we stored it during the sabbatical, and brought it to the new house. I have high hopes for making more progress. The kids are old enough that they can alternate between entertaining themselves in the yard and "helping" me do work. The only real distractions will be repairs/upgrades on the house. That can't distract me too much, right? ;)

Will the car be ready to drive at the end of summer 2020?

Leaving the garage in Whittier

In its new home

Thursday, September 5, 2013

Yellow and Sharp

We're back from the body shop. They worked their magic and it's impressive. These are some photos of the cancer that ate away at Mr. Bug.

Look at those gaping holes that should be solid metal!
The water that got in through those holes up above
caused a mighty bit of damage here as well.
And there was more, although these are the worst. Look at them now:


Holy cow! A few trips to the junk yard to cut off good metal off old cars (and some amazingly skilled work) and this bad boy is like new.

But I'm skipping to the end. Let's back up and a couple shots of work in progress:

Partially primed. If you look carefully in the luggage
compartment you can see some new metal welded in at the top.

All primed and ready to go
I even asked for an extra job and they threw it in for the same price. The new floor pan we welded in came with some lousy seat rails that were too narrow for the existing seats. I wanted to replace them with the original rails. They did a great job on that too - even sealed it nicely.


And now?

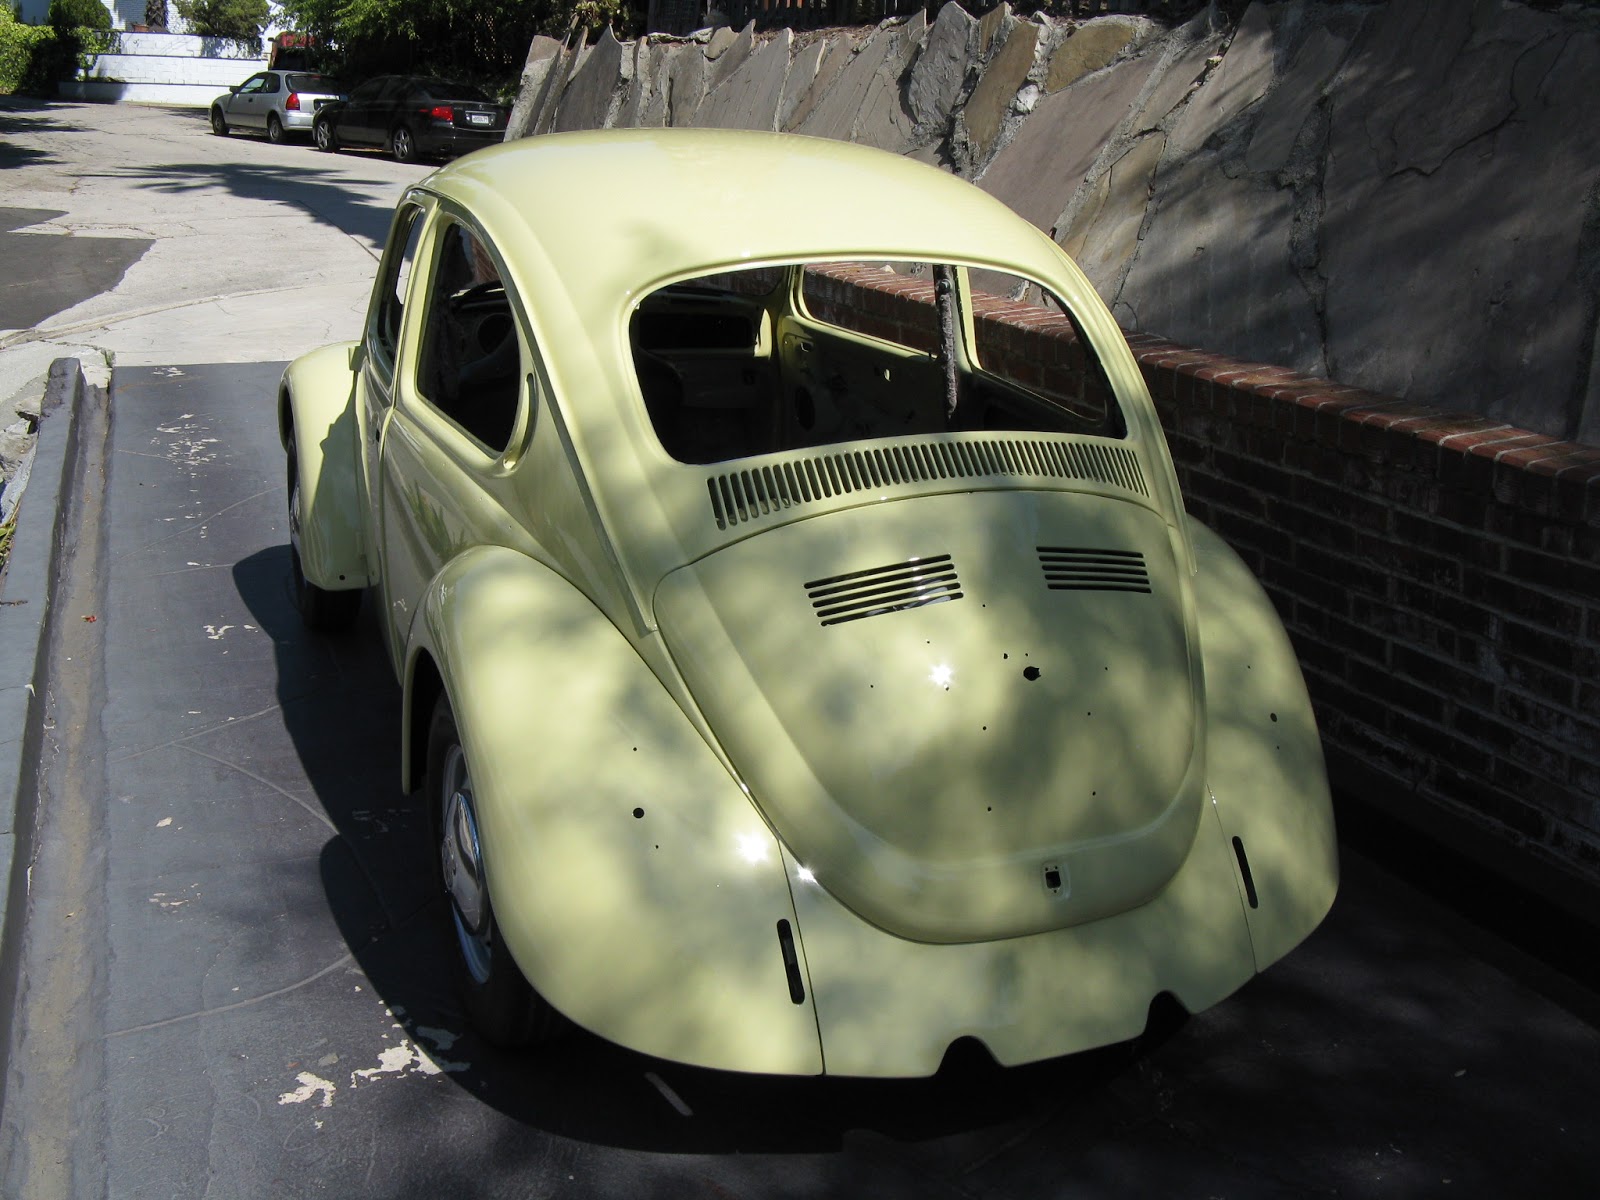
Yellow and sharp.

Back to the original color
They even painted the rims and buffed the hubcaps
Now the fun starts: putting it all back together! Now that I'm over the body shop hurdle there are no more excuses for ignoring this thing. Man, it's gonna be a lot of work. Let's do as much as possible before baby gets here!

Baby pumping his fist, saying "Go dad! Finish the car!"


About 2 hours to pick it up from the shop. Time spent in the shop: just over two weeks. Quick!

Friday, August 9, 2013

Body Shop!

After about 5 years and 2 moves up and down the West Coast, the project is about where I expected it to be in summer of 2008: in the body shop.

First, we had to move it back down to So Cal from Oregon. Here we are, loaded and ready to go to a bigger truck.


The big hurdle was just finding somebody to do the body work who was both affordable and trustworthy. I couldn't find anybody affordable in Corvallis, and struggled for a bit here in LA (LA is a hard place to get to know!). After asking around at a few VW garages, and driving to a few body shops, I ended up at Eddie's body shop. I saw one of his existing bug projects and the work looked really good. The price was reasonable, too, so I'm hopeful it may just work out.

It didn't take much effort to get the car ready. Just putting in some gas, charging the battery, firing up the engine, and stripping it completely. I also fixed the tow lights on the Jeep and got some nice magnetic mount tow lights to be ready to tow it home without scratching the new paint job.

I towed it to Eddie's once to have him issue an estimate, and then I just towed it down once more to drop it off. So anti-climactic for overcoming such a major hurdle.

Here we are, at home, ready to tow it away, and at Eddie's (on 7/31 about a week ago) ready to drop it off:


Estimated time to finish, about 3 weeks. I would expect more.


Time to get it ready: 2 hours.
Time to tow for estimates and drop off: 5 hours.
Time to get ready for tow: 2 hours.

Wednesday, August 31, 2011

I can't quite believe it all worked out

Early on the fourth straight day of battling with the car, the engine is in and the car is running; I'll be able to drive it onto the truck. I'm not sure I believe it. Not bad for not knowing what I'm doing.  Here's how it unfolded:

I lost a couple days to packing, work, and a huge yard sale, so Sunday was when I started up again on the car. It was the first of several days waking up early without an alarm. I did a fair bit of planning to devise a blocking scheme to lift my car without killing myself. It took two trips to Home Despot, considerable patience and some schlepping of the jack back and forth to get the car up and the engine in place. This is how it looked with the car at the proper height and the engine underneath the engine compartment:


and here is the engine a bit higher:


The next day was a day of lessons learned.  The first attempt was a bust.  Apparently the rear engine tin and the muffler need to come off - the fit is just too tight otherwise.  So up went the engine and then down came the engine to take off the tin and muffler.  Fits much better that way:


Once I got it lined up it slid in so easily I wasn't sure it was even in.  I tightened the engine bolts to spec and started connecting all the goodies that connect to an engine when I realized that the gas cable couldn't pass through... and thus started the battle of Tona versus the rubber.  I think it was about two hours to get that damn seal anywhere near where it should be - pushing it in, undoing the engine bolts, sliding the engine out again, using tape to hold the seal upward, cursing, sweating, who knows what else.  Eventually I got it done, made sure the gas cable could pass through well, and re-attache the tin and the muffler.  I was spent after a long, 8 hour day.  Here's the engine installed with the tin and muffler reassembled.


The following day, Tuesday, I got down to business reconnecting ignition wires, hoses, the gas tank, a new battery, and all other miscellaneous items that needed connecting.  With any luck, the car would be running by the end of the day... luck that was not to come.  Before putting gas in the car, I decided to turn the key to see if the starter would even turn and ... nothing.  Not even the solenoid.  OK I lied.  Not nothing.  The turn signal indicator light was flashing, even thought the turn signals and emergency flasher were not turned on.

At this point I started freaking out.  We were now in land of open-ended trouble shooting and who knows how long this might take.  I followed some sort of systematic trouble shooting. I had fiddled with the turn signal relay and un- and re-plugging the cables seemed to solve that problem, but the starter was still dead silent.  I cleaned all the battery terminals very well to make sure there was enough juice, plugged in the headlights to turn them on and see if they were bright or dim... and then they didn't work at all, so then I ended up trying to figure out that problem on the assumption that the same lack of juice at the headlights was related to the lack of juice at the solenoid.  It turns out the problems were unrelated, and to cut an already unbearably long story short, I noticed a disconnected cable, checked the wiring diagram, reconnected it, and viola!  A turn of the key and the starter came to life.  I never solved the headlight issue, but I ended the day pretty convinced I'd get the job done.

Today, the fourth day, was a glorious finish.  I got gas, filled the tank, poured some in the carb, and even though it didn't start right away, my neighbor came over with some engine starter spray, and I sprayed that sucker while he started the car and eventually the fuel pump started drawing fuel from the tank.  I did a quick tune - points gap and timing - and then I did a quick test ride.


This was the first time the car had been driven in over three years.  I didn't know how relieved I'd feel that this was all finished.  I pulled in triumphantly to the drive,


and  then just did the boring task of getting the car packed and the fenders on for the trip.  A bit of attention was needed since the windows are down and I don't want the headliner padding to fly away.  Here we are, ready to travel:


And then, without losing a beat, I packed up the garage... car gets picked up tomorrow and the stuff on Friday.


Sunday: 5 hours, Monday: 8 hours, Tuesday: 4 hours, Wednesday: 3 hours

Wednesday, August 24, 2011

Re-starting (in a mad hurry)

Well, we're moving to LA - the car is now on it second move and isn't finished... this is highly dissapointing, but I guess its the reality of the situation.  But now the movers are taking the car in a bit over a week and I need to get the car running.  Earlier in the week I got the brakes re-connected and bled.  Yesterday I got the steering column in.  So I guess now I can harness the car's power, which won't be terribly much until I get the engine back in.  That leads to today.

Today was prep of the engine compartment.  I got the tar firewall insulation installed (a rather crappy job too, but it's not very visible and I'll be tarring up the inside of the car too) and one of the rubber engine seals.  I got under the apron and cleaned off loose surface rust.  Not really necessary but this area won't be accessible once the engine is in and I figure a bit of extra protection will help 20 years down the road.  As I write I have a surface treatment eating away any bits of remaining rust and then I'll cold galvanize it.  Then the engine goes in... which I find terrible intimidating... especially under time pressure... we'll see how it goes.

Here's the engine compartment ALMOST ready to take an engine:


 Last three days: 5 hours (1+1+3)


Sunday, September 27, 2009

Welding

I let the latest update lag a bit.  This one is back from Wednesday, September 9th.  The day was exciting.  The write-up is boring.

It was a long day, 7 hours all told.  Rented the welder in the AM.  Came home and practiced making some beads on scrap metal.  Once I got the MIG settings right and had taught myself to weld, I did half of the welding job on scrap metal.  Only then did I get around to the parts on the car.

All in all it went quite well.  I plugged all the spot welds that were previously drilled out.  I only burned through twice.  A couple of pieces of scrap metal tacked onto the back let me finish those last two welds.  The welds were pretty big, so I spend a good amount of time grinding.  A couple welds needed to be filled in a bit more and reground..  I think it looks pretty good:


To finish off, I sprayed all over with the cold galvanizer.  I then yanked on it as hard as I could.  The piece didn't budge at all.  Hopefully it will pass the "doesn't fall apart while driving" test.


7 hours

Saturday, August 1, 2009

Look Ma, no engine!

First things first: the water problem is resolved. The water test came back negative. Now we just have to wait until winter to drive it in the rain.

Exciting things second: the engine is out and the new apron fits like a glove. In terms of complexity, there really wasn't anything difficult. I just followed the manual step by step. In terms of intimidation it was pretty high - I hear the engine is kind of important if you want your car to run. In terms of actually removing the upper engine bolts, it was a real bear. You can't see either and have to feel around for both. The one on the right side removes from inside the engine compartment - the bolt on the other end has a specially shaped head that keeps it from spinning. The one on the left side removes from underneath the car, tucked behind the clutch lever, and requiring a ratchet with an extension on it - the nut is pressed into the engine block. A true pain in the ass... and the knuckles. That said, once the bolts were out it was easy to just pull the engine out backwards (while resting on a floor jack) . I'm still not sure how I'm getting it back in once the apron is in the way - it's gonna be a much tighter fit.

I guess I'll jump off that bridge when I get to it. Now for pictures:


Car minus engine


Engine minus car
(oohh... pretty)


New apron in place


A few spot welds to fill

Now I'm away from the car for three weeks... enough time to figure out what to do about the welding.


Thursday: 3.5 hours

Monday, July 27, 2009

Misc Progress

Task #1 was to re-water test... and unfortunately I still haven't found the area of intrusion. I scraped off the previous repair and looked extremely carefully. It seems that there are a couple locations. One is at the rubber seal itself, near the shift coupler where it turns a sharp corner. This area got sealed with the window bead sealant, and a water test indicated that the repair is holding. A second spot is at the grommets. These ones got blocked with foam (again). I'll water test tomorrow after curing. I also noticed that the bolt that holds the battery in place is leaking a bit. I placed bead sealer and will also water test tomorrow.

This has gotten me thinking. I'm going to drive the car during a rainy season without carpet intalled. This will let me see if under operating conditions there are any other leaks to fix before I install carpet.

Since I want to finish sealing before I drop the engine (not sure why), I didn't get started on the engine, but instead took out the spot welds on the replacement apron. Here's the old and the new.


They're the same size - it's only perspective that makes them look different. The replacement one is not waaay better than the old one, but it only has surface rust and bumps - the old one has some cancer that's eaten the whole way thorough and I sort of mangled it when I took it out. The workmanship on the replacement one is top notch. No mangling here.


Now, who will weld it in???


Monday: 2.5 hours

Sunday, July 26, 2009

Water testing and sealing

Tuesday was time to pick up where we left off. First was to remove, inspect and replace if necessary all the bolts holding the body to the chassis. Any bolt showing thread corrosion got replaced (about half) and the front ones got the shiny new stainless ones. They all got a healthy dose of anti-seize lube. This took surprisingly long, but I guess there are a lot of bolts and cleaning and inspecting each one takes time.

Next was time to water test - to make sure the seal is doing its job. Unfortunately, there was water intrusion in two places. Place number one is up front. What seems to be happening is that water is getting up into the crack marked in red...


... and then draining downhill (marked in blue) and leaking into the car at the two corners marked in red


Place number two at fist glance seemed to be near the back at one of the grommets:


On Friday I applied expansive foam to all the locations marked in red in the previous figures. In retrospect, I shouldn't have placed it on the inside front. With foam there, if the front seal fails water could possibly get caught in the gap and cause corrosion. Not a big deal and I decided to just leave it.

On Saturday I trimmed the foam. That stuff really expands, so it kind of got all over. Not the prettiest job ever, but at least up front it did the trick. Here's what it looks like:


Like I said, not pretty, but it survived the water test. On the back, it turns out that the grommet was not the problem. It seems that the water is getting in near the top center around where you adjust the shift coupler. It wasn't clear exactly where it was coming in, so I just sealed all possibilities symmetrically on both sides.. and the grommet as well. Will water test tomorrow.

Once this is done here's what's left to do before the body shop: (1) cut spot welds and get the new apron ready, and (2) drop the engine to be able to weld it. I am leaning towards having the body shop weld it, although I'm still toying with (3) welding it myself of finding myself a new welding buddy. Last is to (4) remove the steering column and (5) catalog all the work that needs to be done. It's possible that I may still do a little bit of cleaning out the electrical and air in the trunk area... at any rate, we're getting close. Today I studied the engine removal procedure, and tomorrow I'll give it a shot after finishing the water testing... It's gonna be a scorcher (high 90s or 100) so I may not stand doing too much work.


Tuesday 3.5 hours, Friday 30 min, Saturday 1 hour

Monday, July 20, 2009

Unpacking

Spent about 2-3 hours taking off the fenders, gas tank, running boards, etc. Who knows why it took me so long. It was hot. I took lots of breaks. We're back to where we were before leaving SD. Goal is to have car ready for body shop before I leave for SD.

Friday, July 17, 2009

What's going on?

I have absolutely no idea what's going on. Last week I finally got around to pushing the car out of the garage. I took out all the stuff I had packed away in the car. This is the explosion:


But how did I get here??? Somewhere in my distant memory I seem to remember packing seats, glass, and sheet metal into the car, reinstalling fenders, etc., and loading it onto a truck. Oh yeah... that's what happened. We loaded the car onto a flat bed truck and rolled it into a moving truck.


It's been sitting in the garage for about 9 months now. I think I took it out once to organize the garage. Then work happened. And beer making.


Okay, it has nothing to do with the car, but it's a beautiful picture and at least I have something to show for 9 months of not working on the car. That's a golden ale on the left (my first all grain) and an imperial IPA on the right. Back to excuses: there was also a cold, rainy winter. And traveling. Now I have my garage all organized...


...and I have no idea what to do next. Intimidating. I made some notes. It involves among other things dropping the engine and welding stuff.

Wednesday, August 27, 2008

Last days of chassis freedom

The last tasks prior to replacing the body have been completed. I installed the remaining shroud, the carb and the heater boxes. I redid some of the wiring: new spark cables, repaired back up lamp cable, and repaired the insulation on the battery to starter cable. Here's the finished engine from the back and from the side:


Very nice. You'll see the fuel filter is missing. I moved it to the the gas tank instead (to reduce risk of fire). I checked the grommets in the firewall and chassis; I replaced them as necessary (and as available). The best part was being able to put in the missing grommets on the accelerator cable shaft. That loose shaft had been bugging me for years! I used standard 1/2" hole plugs and cut the right size orifices in them. Worked like a charm. Here they are:


As an added bonus I just happened to find a replacement at the auto shop for the fan flap clippie thing that I had lost.

Next prep item was getting the body seal in place. I held it in place with glue and I out the body bolts through the seal to help keep it in place. A couple nails in the front where the pan curves were useful too. Where I cut the seal to turn corners, I used a bit of window ribbon sealer like so:


After I cleaned out all the threads for the body bolts we were ready to get the body back on.

I enlisted the help of Jenny, Nekarda, Anna, Hannon, and Alicia. We lowered the car down slowly; every several inches we re-tightened the straps holding it to the ceiling (if you don't know what I'm talking about look at this post). It all went as according to plan as it could. The body's now on the pan and all the (old) bolts are in. I still need to replace bolts, but this is how it will be for now.

All told I used my friends' help for just about an hour. Y'all MF'n rock! You're cheaper and more legal than hiring undocumented labor.

There she is all finished:


I've gotten so used to seeing the body hanging up high that it feels so short now. The garage also feels much more spacious.

The rear looks a bit odd without the apron:


Well that's it as far as restoring in San Diego goes. The project now moves to Corvallis, Oregon. To get the car ready, I'm reassembling a good part of it - fenders, running boards, bumper brackets, seats, steering column. Most of this will come right back off in Corvallis - bummer. I also acquired the rear apron at Interstate, so after a small break while I get installed in Corvallis and take a break from this project, I'll be ready to do body prep work. Damn it's gonna look good.


Monday: 3 hrs, Wednesday: 7 hrs. Thursday: 4 hours (plus 5 volunteer person-hours). Moving-related tasks not counted

Saturday, August 23, 2008

Reassembly

Sunday

Before getting to reassembly I made a quick survey and touched up paint and undercoating as needed; it was just a few places and it was quick. Next I assembled the freshly-powdercoated, old cylinder covers. They went in almost perfectly, unlike that aftermarket crap. Interestingly, the additional thickness from the powdercoating changed the dimensions just enough to be noticeable; I would have never thought it mattered. After that it was on to the fan cover. Reassembled the fan/generator/backing plate (vent hole is oriented down) and installed that whole puppy into the fan housing, then installed new flaps.

Getting the fan housing back on was more troublesome than I thought. I had to figure out the right place for the thermostat rod to go and it turns out that the piece connecting the left and right flaps has to go on after the housing is connected, not before as I was trying to do it. And it also turned out that something wasn't assembled right 'cause just when I thought I was done, I spun the generator and the damnit if the fan wasn't rubbing on something. I fiddled with the fan for a bit and by the end of the day it seemed that everything was properly adjusted and installed except for a bolt that I busted the head off of. Looking good!


The most annoying turn of events was when I went to install the thermostat bracket and realized that the engine block didn't have a stud for it. Really? After all that effort to acquire the missing parts?


From what I hear the later Mexican blocks omitted the bracket. Looks like somewhere down the road I'll have to drill & tap & install one - the boss is still there. I guess that's why the thermostat was missing. They must have thrown in out when the new engine went in. Lovely workmanship.

Monday

Bought a screw extractor of the right size and removed the broken bolt no problem. But after removing the housing (to replace all four generator backing plate bolts, cause why not?) I reinstalled the housing and the damn fan was rubbing again! After removing and replacing the housing like a million times I finally realized that the fan was rubbing because the powdercoating made the pieces thicker. I had used the same number of shims as before, but that just wasn't working. Adding a new shim finally made things better. In the process I also bent the thermostat bar just right so that the flaps move with no resistance... now if only I had a place to attach the thermostat bracket!

Of all the times I dis- and re-assembled the fan housing, I didn't lose a part till the very end – one of the clips for the flap system went into lala land. Seriously. I saw it fly off. Looked everywhere. Swept the ground and looked through the pile. Everything. Never found it. I don't think it will be easy to replace, but it can wait until the body is back in place, especially now that I have to remove the engine to replace the rear apron.

Having finished the fan housing adventure, I installed the front shroud. It went in nicely, though I can't quite remember exactly how the accelerator cable housing goes. I also got the intake manifold back in. It turn out that it's much easier to get the center portion of the manifold in before the fan housing and generator are in place, so I once again removed and replaced the fan housing.

While attaching the manifold to the muffler I stripped the threads for one of the bolts. I'll keep an eye on it, but I think it is OK. It still seems tight enough, but I'll inspect for heat leaks later when it's running.

Now all that is left on the engine is the rear shroud, lower shroud, carb, and heater boxes. If I want to use an impact wrench for the crankshaft pulley bolt, I'll need to to this before the rear shroud goes in. The heater boxes need welding, and it will be better to do this out of the car, but I'd rather have them installed so I don't risk falling behind schedule. The body needs to get back on for the move!

Rest of the week

Tuesday: Love for the Jeep. I took it to the shop for a good pre-trip inspection.
Wednesday - Friday: House-hunting trip in Corvallis.

Left to do prior to body replacement on this Thursday:
  • Engine reassembly (almost done)
  • Replace that little clip I lost
  • There's a little asbestos(?) piece that slides inside the connector around the heat risers. It would be nice to find new ones... but it can wait
  • Replace rubber grommets as needed
  • Heater insulation replacement
  • Put on body seal (using rubber cement)
  • Clean out body threads
I think that's all... we're pretty close!


Sunday: 4 hrs; Monday: 3.5 hrs

Friday, August 8, 2008

Projectus Interruptus

Picture that scene in a movie: the main character is doing whatever it is, and everything is going according to plan. Then the frame freezes, you hear the sound of a scratched record, and the main characters sports the most miserable, confused look on his face.

Yeah. Kind of a bummer.

Let's rewind a bit. I've been working rather manically on this project recently... with good reason. I wanted to finish the body work and paint before moving. And it was possible provided I put in the work and nothing went grossly wrong. And things were going well.

Last week on Wednesday I cleaned, degreased and primed the rear of the chassis and on Thursday I topcoated the chassis and finished priming and then painted the body on all parts that are not visible but that still need protection. And like that I was done painting except for maybe touch ups. I got a call from the powder coater that the parts were in. That would have to wait because I was up to the Bay Area for a wedding.

Here' s the painted area underneath the gas tank:


You can see that I opted for a yellow that would be close to the final color of the car instead of the black I did on the first coat. It's all aesthetics, but the price is the same, so why not? Here's the chassis in its finished state next to the original before all the painting and cleaning:


Not bad. Not bad at all. And look at that shiny new crankshaft pulley... more on that later.

As I saw it all I needed to do to finish on time was make a couple gaskets for heater ducts underneath the car, reinstall those parts, undercoat the car, weld the rear apron, touch up paint, reassemble the engine tin and assorted parts, and get the body on. The plan was to have that done in a week, with the biggest unknown being Matt S's schedule for welding.

On Monday I returned from SF, low on sleep. I picked up the parts and put a first coat of cold galvanizing on the sandblast only parts - intake manifold and heater boxes. Matt S says that it will withstand exhaust temperatures well. I got screws, gaskets, etc that I would need to reassemble the engine parts. Then it was off to spend a night in the desert to see a meteor shower.

Tuesday I had to go into work, but I went to the store, got more cold galvanizing, and finished coating the engine parts. The heater boxes look much better than before:


Now, on Wednesday I didn't have too much time - training, moving-related errands - but I got in in the afternoon. Before arriving I made some gaskets at home for the heater ducts. I installed them and finished undercoating. Here's the undercoating underneath the rear bulkhead:


Those two ducts sticking out of to lower edges are the heater ducts I was talking about. This was the most important area to undercoat because it will be inaccessible once I put the body back on - the transaxle will be in the way. I'm very happy with how well protected this area is. Here's one of the wheel wells:


Now, this area is not as important because it's accessible after the body is back on, but I thought that it would be easier and cleaner to do at least part at this stage. You can see that there is still an unfinished area near the row of bolt holes for the fender bolts. I'll finish once the body and paint is done and the fenders, bumpers, and rubber are back on.

Matt was gonna help me weld either that afternoon or the next morning, so I needed to fit in the new rear apron and do surface prep. And this my friends, is when the needle slid across the record.

At first sight, the part seemed to fit, but I then realized that the groove for the engine seal was not lining up. I measured the parts and sure enough, there was a dimensional mismatch of about 1" between the new and existing aprons. You can see it here:


Note how the groove for the engine seal is right up against the edge in the existing part and set down a bit in the new part. I checked the part number and verified that I bought the correct part. I then went to Vee Parts to ask about it and the guy was all like "oh, whatever, just cut the engine seal into three parts - it doesn't need to line up.... and we never heard about this before and we sell this to body shops all the time." Well, the parts aren't the same and I don't want to compromise the integrity of the seal that keeps exhaust heat away from the engine. That's not how air cooled cars work. Maybe I'm too much of a perfectionist, but it annoys me when people aren't interested in things being done right. Anyway, I called Matt to tell him he was off the hook on the welding job.

Not one to be easily dissuaded, I tabled this issue and got to work on other things. There's lots of engine shroud to reassemble. It's an easy task, really. La-di-da... install the piece in front of the pulley. La-di-da... install the pulley (the powder coating is well done - it took repeated blows from a hammer without leaving a mark). La-di-da... install the cylinder covers. La-di-da... install the lower air flow parts... and here goes the needle scratching over the record one more time.

The parts just weren't mating together.

Now don't get me wrong, I'm quite aware that I can make mistakes, and that's the first thing I assumed, but eventually, it became clear that the problem was that the new cylinder covers were just not the right size - about a half inch too short on the vertical faces. Seriously?! Why do people do this? And sure I could have concocted some fix, but the bottom like is that without the parts mating together, the engine is gonna run hotter, and I'll spend waaaay more moolah on a rebuilt engine. Arghhhh!!!!!

So what's the solution? Well remember that I got new cylinder covers because the old ones had a slight crack, so why not just get new ones? Why not? I'll tell you why not: because after market parts suck! Especially Brazilian ones. I much rather have a slightly cracked part that fits than a new part that doesn't... but this implies another trip to the powder coater and another delay. Having learned my lesson, I'm also powdercoating the other old parts that I was thinking of replacing (the ones that go next to the heater box come in sets of three - one was broken, but the other two were OK). I'm gonna use the old ones now.

Phew! OK. I'm done ranting. Sorry, but this was a big disappointment. Needed to get some frustration off my chest.

Thursday I got into the garage to do some work on the heater boxes. There are few little holes in them that I sealed with high temp putty. There are a few larger holes due to corrosion where the box mates with the curved part of the J-tube. There's no way putty will work on these. A thread on the samba suggests these can't be welded because the metal is too thin, but Matt says he can do it, and I'm willing to trust him. But he's out of town till about 10 days from now, so that's another delay.

That's it for work. I pretty much just took stock of where I was. I cleaned the garage.

So where am I? Well, the main task is to get the body back on the chassis and loose parts packed up either back on the car where they belong or in boxes for movers. I need to wait for the engine to be rebuilt before I drop the body back on, and that means waiting for the powder coater.

I need to resolve this issue with the rear apron. If I do it really soon, I might be able to get the body work done here in SD. Otherwise I'll have to wait for Oregon. This will involve dropping the engine to gain access to the weld locations. If I do this they'll be able to paint the engine compartment all nice and pretty, so maybe this is the best way to go... provided I find a good place near Corvallis.

As to resolving the issue with the rear apron, I need to figure out if there are better after market parts that actually fit. If so I can go that route. Or I might be able to scavenge a part off of an old car either at a junk yard or a reseller like Interstate. I'm leaning towards the latter route.

A couple things to resolve/do prior to replacing the body:
  • Figure out whether the rubber body-to-chassis gasket is enough or whether I should use an additional sealer material
  • Touch up some paint I pulled off with masking tape for the undercoating
  • Replace a rubber gasket for the battery to starter cable - it will be much easier now
  • Replace the foam pad around the heater duct inside the car - again, it will be much easier.
  • And like I said, replace the engine shroud
It would also be nice to:
  • Repair a few stuck/broken bolts in the fender-to-body connection
  • Get the welding done on the heater boxes.
All these tasks can be done equally well with the body on.

That, in painful detail, is where I'm at. In some ways, this is a blessing in disguise, since now I don't have nearly as much to do on this project prior to the move. Suddenly I don't feel as pressured to get a million things done.

Sour grapes.


Wednesday: 5.5 hrs, Thursday: 4 hrs, Monday: 3 hrs, Tuesday: 1/2 hr, Wednesday: 3.5 hrs. Thurs: 1 hr.